
Step-by-Step Tutorial: Connect to SQL Server Using Python on Ubuntu Linux
For this post, I’m using the simple Python development environment that was created in the Quick-Start Python Set Up Guide .
If you’re running this tutorial inside a VirtualBox Ubuntu VM, make sure:
- Network connectivity is enabled through Devices > Network > Network Settings…
- Guest Additions are installed
- Devices > Shared Clipboard > Host to Guest (or Bidirectional) is enabled
- Log in with Ubuntu on Xorg
Otherwise you may not be able to copy data to/from the VM.
- Visual Studio Code installed
- Python installed
- Microsoft SQL Server installed and reachable from the system Python is installed on
Note: This tutorial uses SQL Server and the Microsoft ODBC driver on Ubuntu Linux. The Python code and connection steps apply to any platform, but the ODBC installation section is specific to Linux.
Windows users: You already have SQL Server ODBC drivers installed with SQL Server Management tools.
Linux/macOS users: Follow the installation steps shown here.
To connect to SQL Server, we need a driver. This is typically an ODBC or JDBC driver. JDBC is designed specifically for Java applications and ODBC is primarily associated with Windows platforms. A version also exists for Linux platforms, and that is what we will use today.
To install, we’ll follow the instructions from Microsoft’s Install the Microsoft ODBC driver for SQL Server (Linux)
I’ll use the Microsoft ODBC 18 driver. For these instructions, I’m on an Ubuntu Desktop virtual machine, so I need to click the Ubuntu tab to review the Ubuntu instructions.
Reading the commands, I can see they do the following:
- Run a check to see if the version is supported on Ubuntu.
- Downloads the package, installs it, and deletes the downloaded file that is no longer needed after package installation.
- Installs the driver and adds it to the path.
- Optionally install the dev package for unixODBC development. I won’t need to do this.
Now that I know what these instructions do, I’m ready to give them a try.
The easiest way to do this will be to copy the Bash commands into a script.
I’ll start by opening the Ubuntu Text Editor. There are a few ways to do this. To keep things simple:
- Click the Show Applications button in the Ubuntu Dock. This is the button that looks like rows and columns. Typically in the lower-left corner in the default configuration.
- Type gedit in the search bar.
- Click the Text Editor icon.
With the text editor open, click the Copy button on the Windows Ubuntu instructions window. It should look like this:
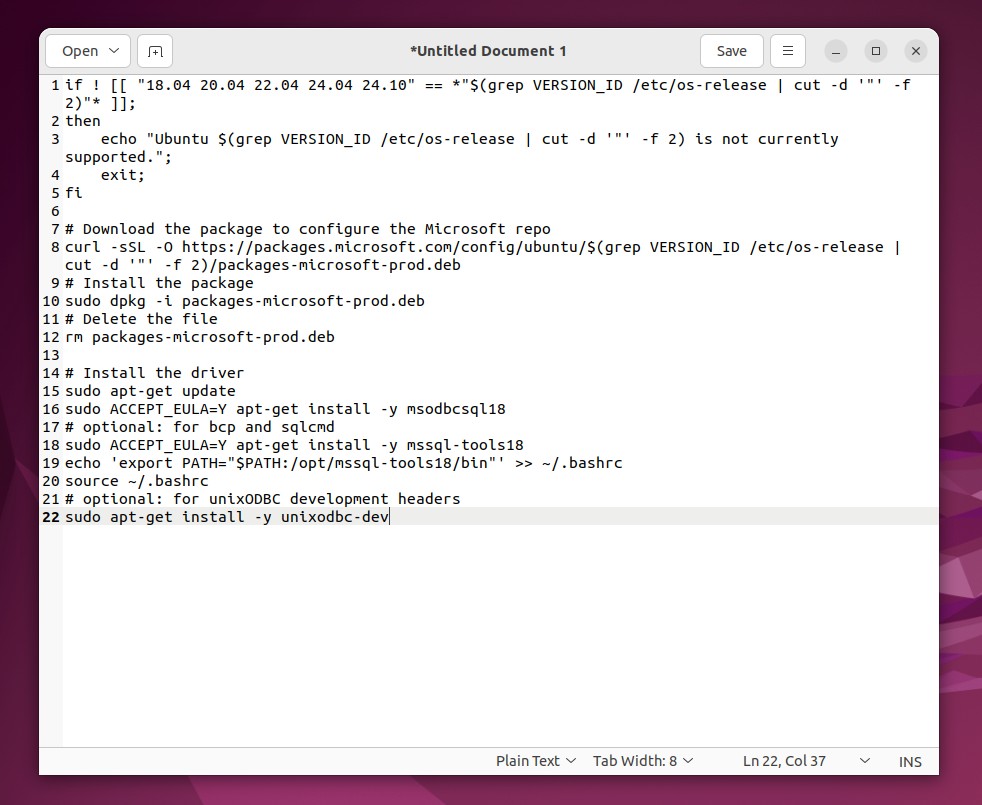
Install Script Copied to Text Editor
Click the Save button and save the file to your home directory with a meaningful name and an .sh extension. I’ll use “install-odbc-18.sh”.
After saving the file with the .sh extension, the text editor should recognize that the file is a shell script and provides some syntax highlighting.
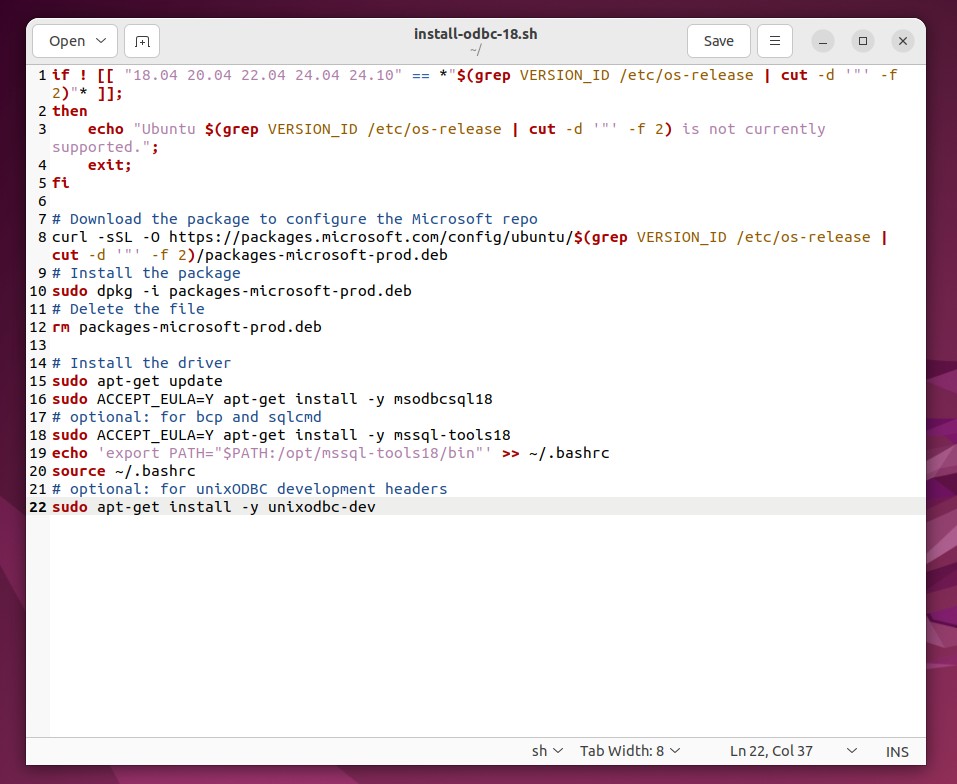
Text Editor with Syntax Highlighting
There is one last thing that needs to be done before I can try to run this script. I don’t need the development headers, so I’m going to make the last line of the script that install those a comment by putting a “#” character at the beginning of the line. Now we have our script that is ready to try.
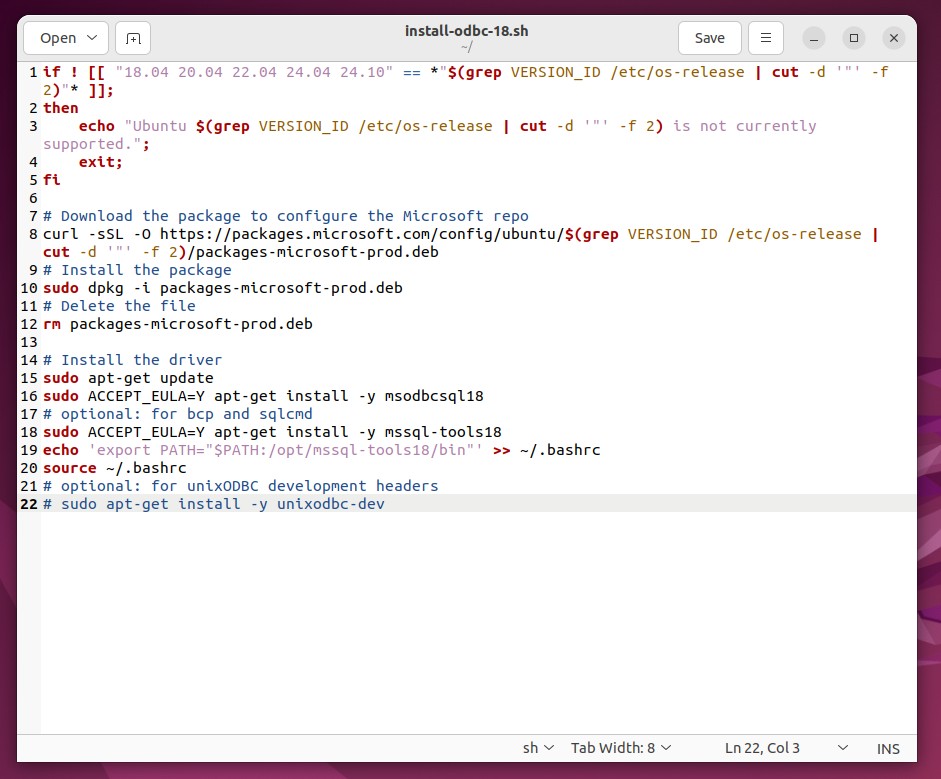
Commented Out Last Line of Install Script
If you haven’t yet installed curl, you will need to install it to complete these instructions. Complete the following steps to install curl.
- Press Ctrl+Alt+t to open a terminal window if one is not already open.
- Run
sudo apt updateto refresh the local package index. - Run
sudo apt install curlto install curl. - Run
curl --versionto confirm curl was successfully installed. If installed successfully, the version information will display on the command line.
To run the installation script:
- Press Ctrl+Alt+T to open a terminal window.
- Run the
lscommand to confirm the .sh file is in the current directory. - Make the file executable by your user by typing
chmod u+x install-odbc-18.sh. If you used a different file name, then replace install-odbc-18.sh with your file name. - Type
./install-odbc-18.shto run the command. If you used a different file name, then replace install-odbc-18.sh with your file name.- Note that the script itself uses
sudoto temporarily gain super user privileges, so we don’t need to use sudo to run the script itself.
- Note that the script itself uses
- Press enter to run the script.
- The script will run and install the ODBC driver. Read through the output to check for any errors.
My output from the script looks like this and appears to confirm the driver was installed:
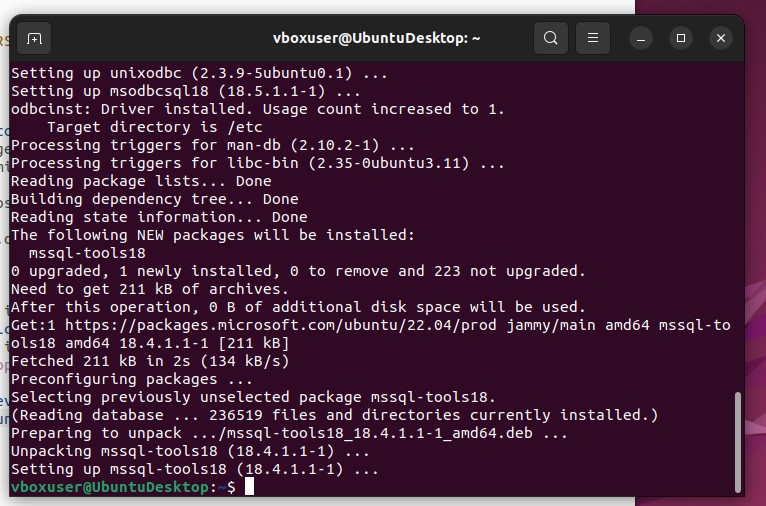
Output of Installation Script
To install the Python ODBC library:
- Install the Python Development
- If needed, run
sudo apt install python3-pip - Run
pip install pyodbcfrom the command line to install pyodbc.
I’ll open Visual Studio Code by pressing Ctrl+Alt+T to open a terminal, typing code and pressing enter.
VS Code opens. If you’ve been following along with previous tutorials, the Python project files should be open in the file explorer.
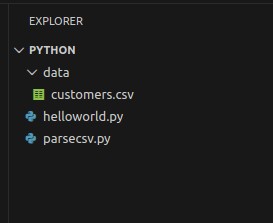
VS Code Python Project Folder
I’m going to create a new file for the SQL Server connection example by clicking File > New File…, selected “Python File” from the VS Code drop down. This will open a new file in the VS Code editor with a name like “Untitled-1”.
I’ll save the file by clicking File > Save As… and entering the file name “sqlserver.py” in the Ubuntu Create File dialog. Note that I’m saving it in the same python directory that was used for the previous helloworld.py example.

Create the new file named sqlserver.py
Click Save to create the file. It should automatically open the VS Code Editor.
For this example, we’re going to use the following code.
# Import pyodbc module
import pyodbc

# Define connection string
connection_string = (
    "DRIVER={ODBC Driver 18 for SQL Server};"
    "SERVER=your_sql_server_ip_or_hostname;"
    "DATABASE=your_database_name;"
    "UID=your_username;"
    "PWD=your_password;"
)

# Start a try/except block
try:
    # Attempt to open the connection
    cnxn = pyodbc.connect(connection_string)
# Report any errors
except pyodbc.Error as ex:
    sqlstate = ex.args[0]
    print(f"Error connecting to SQL Server: {sqlstate}")
 # Close the connection
finally:
    if 'cnxn' in locals() and cnxn:
        cnxn.close()
Copy the above code and paste it into the sqlserver.py file.
I know this isn’t going to work, as the connection string is incorrect, but I’ll click the Run Python File button to run the file and see what happens. I get the following error output:

Error connecting to SQL Server: HYT00
The error is “Error connecting to SQL Server: HYT00”. This error indicates a connection issue with SQL Server. This is expected because the SERVER parameter is still set to “your_sql_server_ip_or_hostname”.
To connect to SQL Server, the connection string needs to be updated with the server’s connection information. I’m going to do this one step at a time.
I have changed the connection_string variable as shown below. My sql server is running on the same Ubuntu VM as my Python development environment. So, I can set the SERVER parameter to 127.0.0.1, the localhost IP.
connection_string = (
    "DRIVER={ODBC Driver 18 for SQL Server};"
    "SERVER=127.0.0.1;"
    "DATABASE=your_database_name;"
    "UID=your_username;"
    "PWD=your_password;"
)
I’ll try clicking the Run Python File button again and check the output. I’m now getting the following error:

Error connecting to SQL Server: 08001
This error indicates a network-related issue preventing a client from connecting to SQL Server. The error message changing may indicate a step in the right direction. One of the things that can cause this error is incorrect login credentials or permissions. I haven’t yet updated the user or password, which is probably why the error is occurring.
I have changed the connection_string variable again as shown below. I’ve set the username and password to a database login account I have already created on my SQL Server instance.
NOTE: This is for demonstration and testing purposes only. Hard coding credentials in the connection string is bad practice.
connection_string = (
    "DRIVER={ODBC Driver 18 for SQL Server};"
    "SERVER=127.0.0.1;"
    "DATABASE=your_database_name;"
    "UID=vboxuser;"
    "PWD=myubbox25!;"
)
I’ll try running the python file again, but I get the same error:
Error connecting to SQL Server: 08001
I get the same error, even though I know my user and password are correct. Let’s continue and set the database.
I’ve updated the connection string to use the name of the actual database I want to connect to on the sql server instance.
connection_string = (
    "DRIVER={ODBC Driver 18 for SQL Server};"
    "SERVER=127.0.0.1;"
    "DATABASE=appdb;"
    "UID=vboxuser;"
    "PWD=myubbox25!;"
)
Another try results in the same error:
Error connecting to SQL Server: 08001
I know my parameters are correct. So why is the connection still failing? The final piece of the puzzle is encryption. Modern clients after SQL Server 2016+ default to encryption ON. My client is trying to establish an encrypted connection. However, I haven’t installed a certificate on my local SQL server instance. If you’ve been reading my series on Cryptographic Failures , you will know that we should always encrypt data both in transit and at rest. In a production system, we would want to install a trusted root certificate on SQL Server. For now, however, we can tell the connection to encrypt and just trust the self-signed certificate created when SQL Server was installed.
Update the connection string to add “Encrypt=No;” and “TrustServerCertificate=Yes;”, as shown below:
connection_string = (
    "DRIVER={ODBC Driver 18 for SQL Server};"
    "SERVER=127.0.0.1;"
    "DATABASE=appdb;"
    "UID=vboxuser;"
    "PWD=myubbox25!;"
    "Encrypt=Yes;"
    "TrustServerCertificate=Yes;"
)
After making these changes, I click Run Python File again, and the following output displays in the console:

No Errors in the Console Output
The script output nothing. This is the expected output for success because all the script is doing is opening the connection and then closing it again. This tells me that Python is now successfully connecting to SQL Server.
Let’s add a query of some kind to get data from the server and write it to the console. Update the code to match the following example:
# Import pyodbc module
import pyodbc

# Define connection string
connection_string = (
    "DRIVER={ODBC Driver 18 for SQL Server};"
    "SERVER=127.0.0.1;"
    "DATABASE=appdb;"
    "UID=vboxuser;"
    "PWD=myubbox25!;"
    "Encrypt=Yes;"
    "TrustServerCertificate=Yes"
)

# Start a try/except block
try:
    # Attempt to open the connection
    cnxn = pyodbc.connect(connection_string)

    cursor = cnxn.cursor()

    # Execute a query to get the value of the @@SERVERNAME variable.
    cursor.execute("SELECT @@SERVERNAME;")
    rows = cursor.fetchall()

    for row in rows:
        print(row)

    cursor.close()

# Report any errors
except pyodbc.Error as ex:
    sqlstate = ex.args[0]
    print(f"Error connecting to SQL Server: {sqlstate}")
 # Close the connection
finally:
    if 'cnxn' in locals() and cnxn:
        cnxn.close()
This will read the @@SERVERNAME property from the database and write the value to the terminal output using the print command.
After making these changes and clicking the Run Python File button, the following output is displayed in the terminal:

Value of @@SERVERNAME Output to Terminal
In this tutorial, we looked at how to connect to a SQL Server database using the Microsoft ODBC driver for SQL Server (Linux) and the python pyodbc module.